Today we will use HTTPS Load Balancing for this lab
HTTPs Load Balancer mostly used for Global in layer 7.
In order to use https Load Balancing you should have instance group
Yesterday we have done lab on Instance group, If you have deleted your instance group you can create and refer this link :- bvakash.hashnode.dev/google-instance-group-..
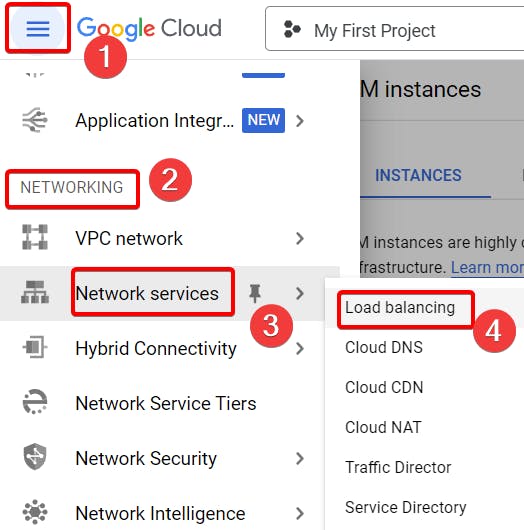
Step 1:- Expand services scroll down you should see Networking under that Network services followed by Load Balancing.
Step 2:- Click on create Load Balancer.

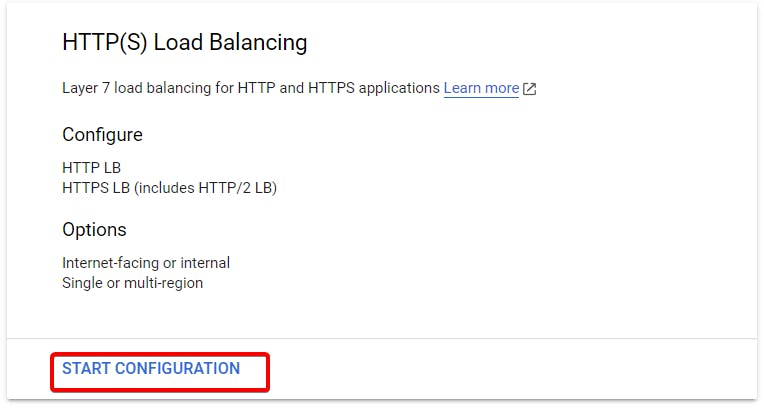
Step 3:- Choose HTTPs Load Balancing.
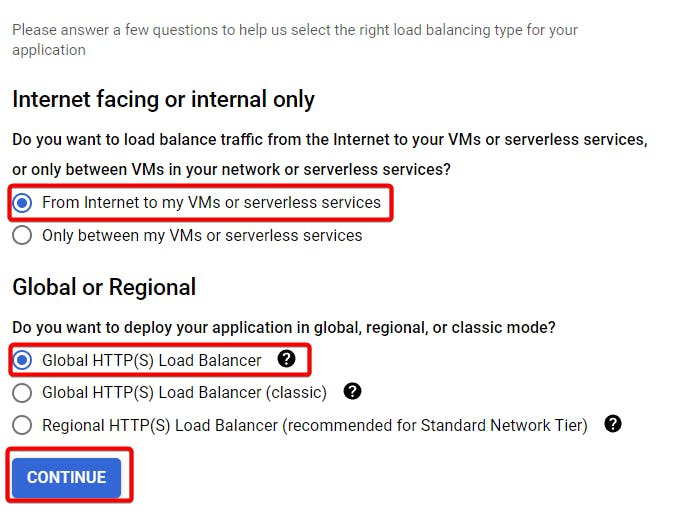
Step 4:- Everything will be default and click on continue.
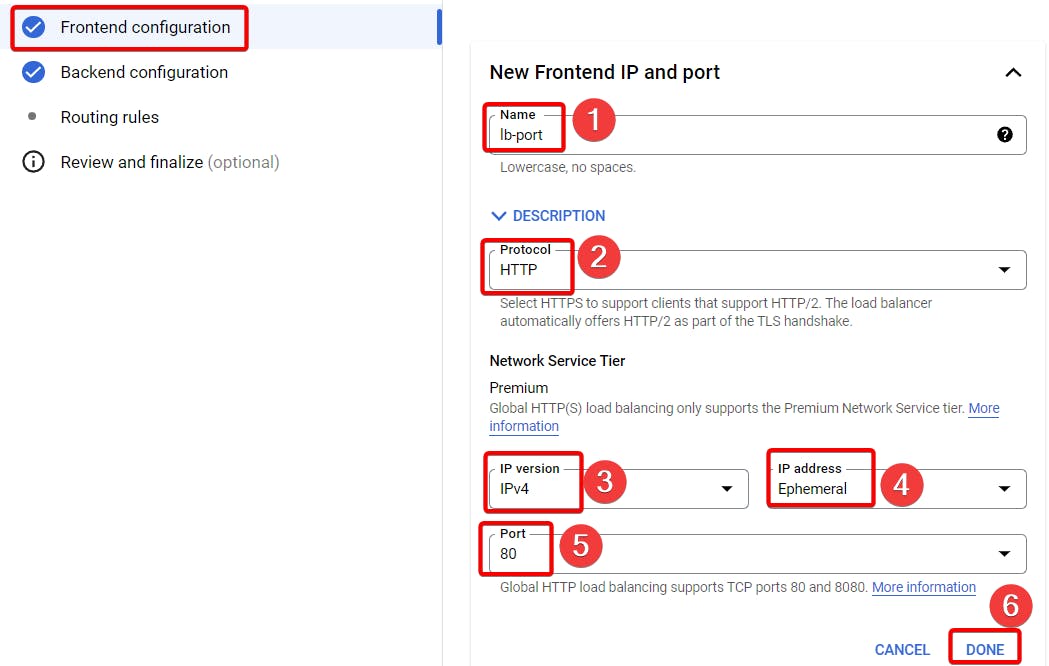
Step 5:- In frontend Configuration, Name your frontend Configuration, Make sure you have chose HTTP protocol and port 80, Finally click done.
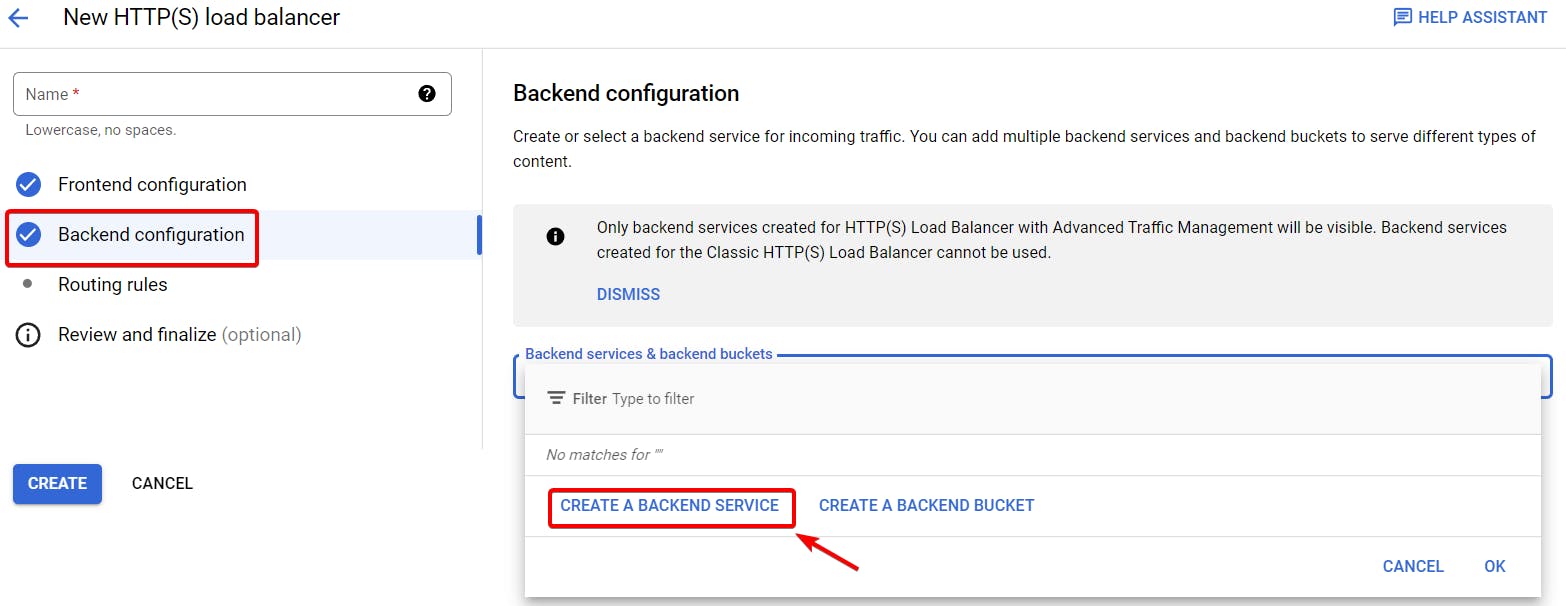
Step 6:- Click on create Backend service.
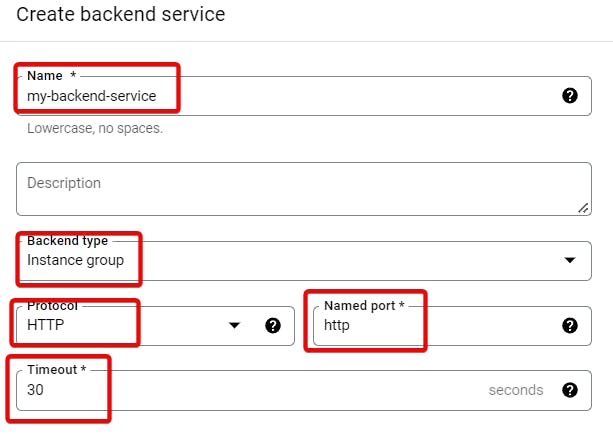
Step 7:- Name your Backend service, Backend Type should be instance group, protocol to be HTTP.
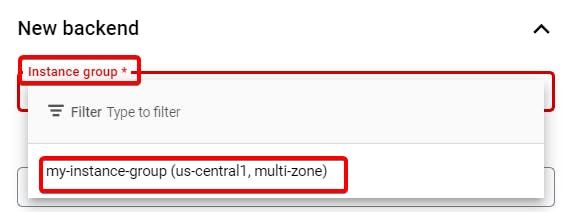
Step 8:- Choose your instance group.
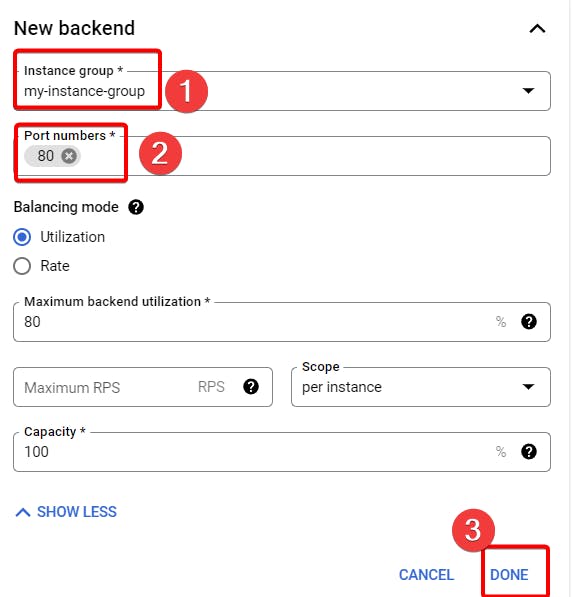
Step 9:- After choosing instance group, give a port number 80 and click done.
Step 10:- In Health, Click on create health check.
Health Check in Load Balancer is used to allow traffic to a healthy machine, But there is a Health check in Instance group also which is used for auto healing, If suppose one of the instance has issue, Health check will know and instance group will help to get a new healthy instance.

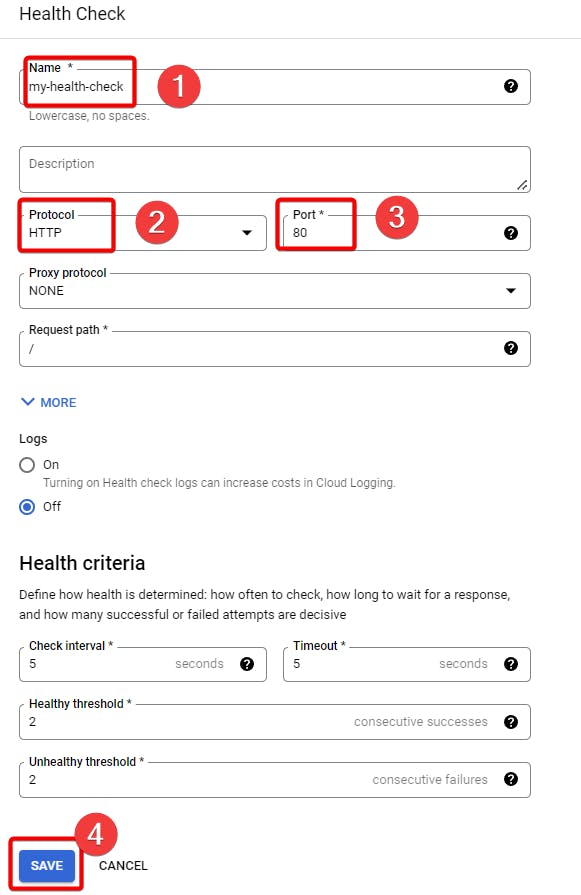
Step 11:- Name your health check, Protocol should be HTTP and port 80 finally click save.
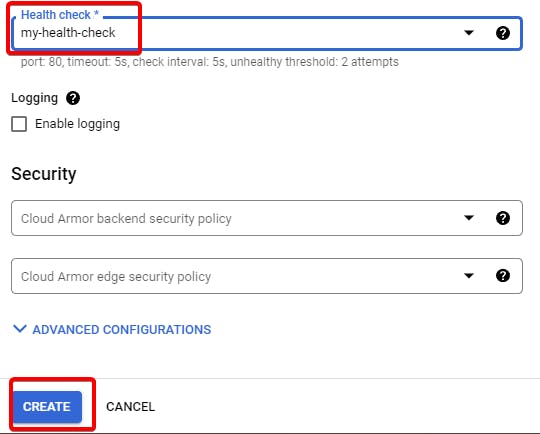
Step 12:- Choose Health check and click create.
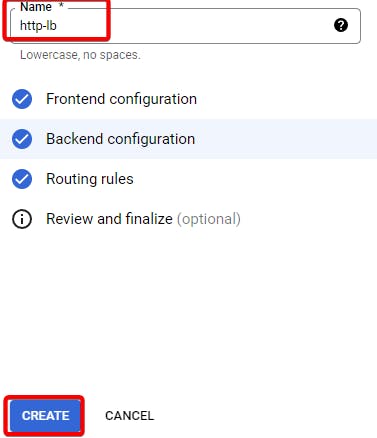
Step 13:- Name your HTTPs load Balancer and click create.
Step 14:- Go inside your Load Balancer and copy, Paste your Load Balancer IP address.

Step 15:- You should see your traffic has been balanced across servers.

Finally we deployed HTTPs load Balancer using instance group.
That's it, for now, we will continue further more in next blog.
Hope you liked it. Will see you on the next topic 😃
