


In this lab, we are going to launch our VM in our particular subnets which are public and private subnets.
before this lab complete Google VPC - Routes refer this link :-
https://bvakash.hashnode.dev/google-vpc-routes
First, we will do a public Subnet
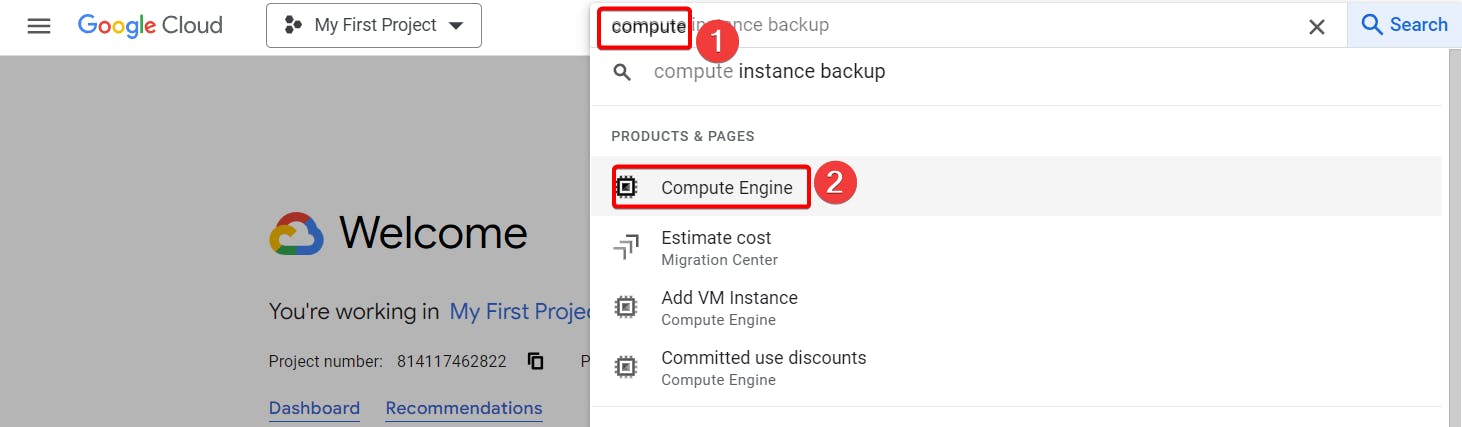
Step 1:- Once you go to your GCP dashboard or console, Write compute and then click on Compute Engine.
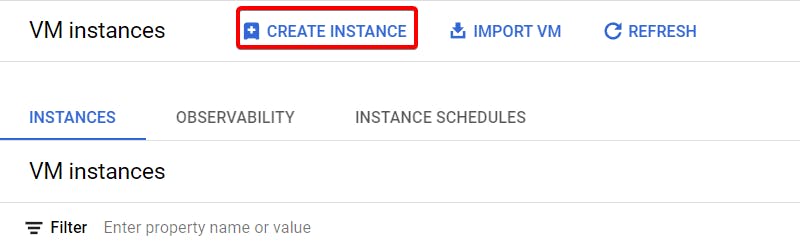
Step 2:- Click on create instance.
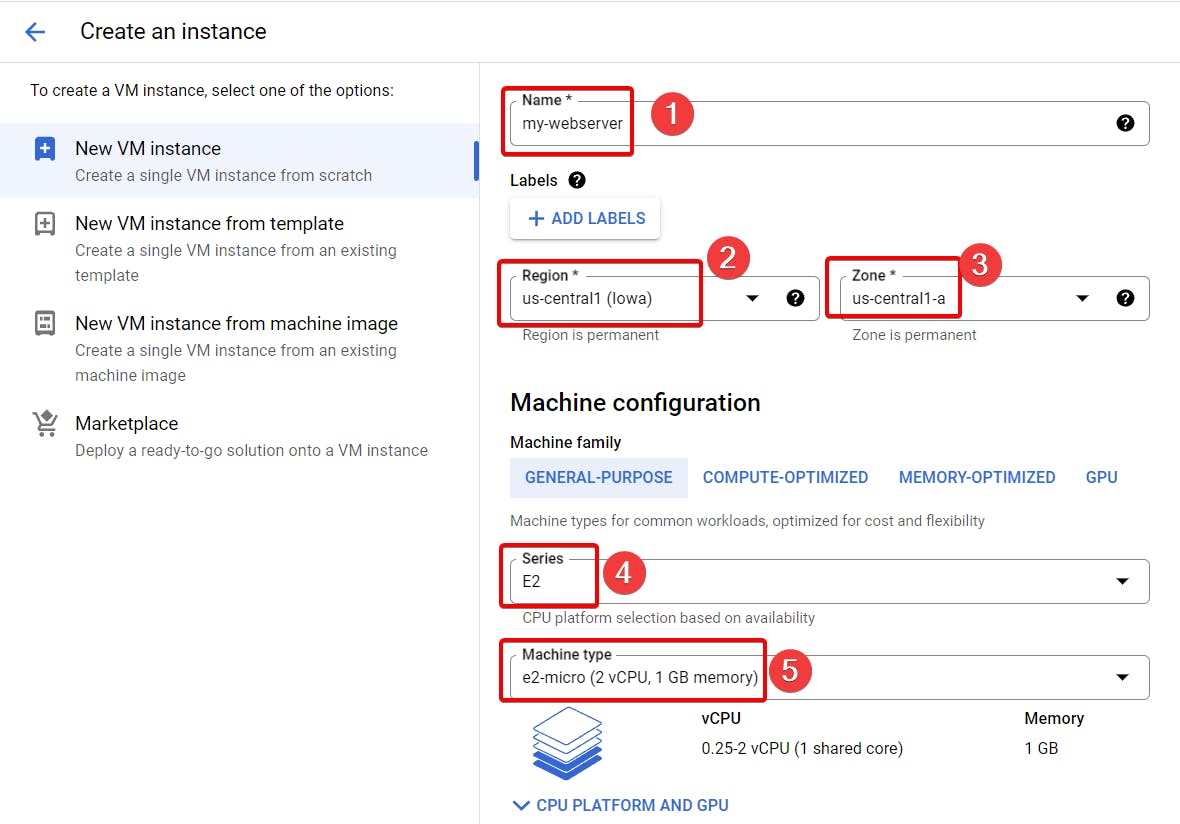
Step 3:- Name your instance, choose the region where your subnet resides and can choose any zone. Finally, choose a machine family according to your wish.
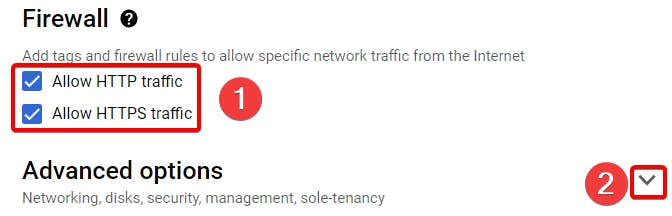
Step 4:- Under the firewall allow HTTP and HTTPS traffic, Expand Advanced options.
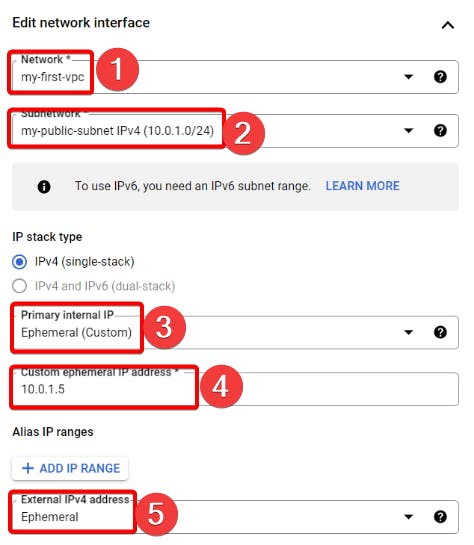
Step 5:- Click Network, Give public tag(because we are making webserver our public facing server for now)under network tags, Scroll down and under Network choose your VPC network and choose public subnet as we want to face this server to the internet for now and click on done.
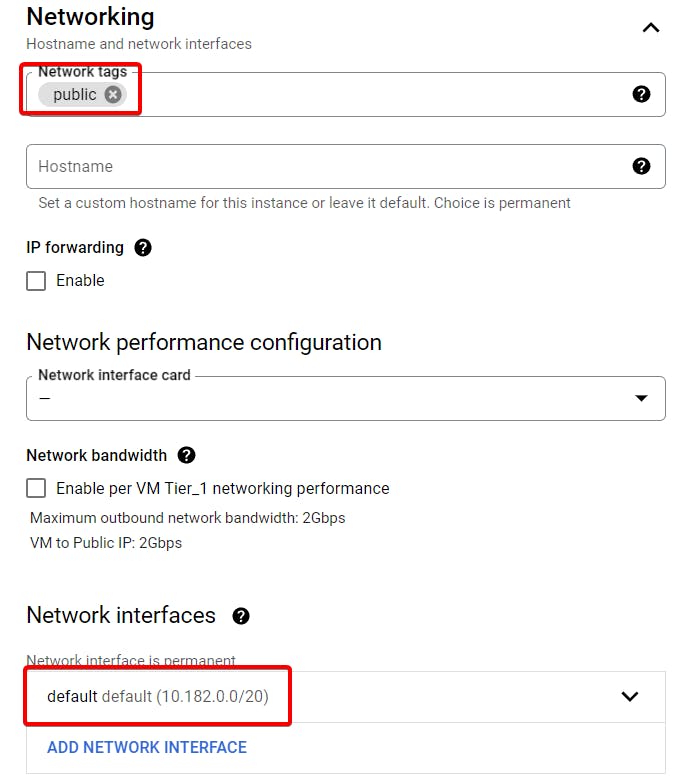


Make sure you give a custom internal IPv4 address.
Step 6:- Now click on create.

That's it, for now, we will continue further more in next blog.
Hope you liked it. Will see you on the next topic 😃
Next Topic
https://bvakash.hashnode.dev/creating-vm-with-using-subnets-private-subnet